A common problem in the digital workflow is an improperly setup file that is not print-ready. This will turn into time lost and fees to repair the file. This post will guide you through the proper way to setup a print-ready file for a digital print workflow in Adobe illustrator.
The first thing is to identify what the digital workflow is. The digitally printed workflow differs from the traditional print workflow used in offset, flexography, and other commercial printing methods. The digital workflow output is created by a roll fed printer, then laminated down to a substrate panel or created by a flatbed printer which applies the art directly to the substrate. Common materials include channel board, foamed PVC, and a variety of other plastic panel materials. After there are graphics on the panel the finishing process begins. The panel will be cut on a flatbed cutting table to produce the desired shape and size of the sign. The cutting table uses an ARMS system (Automatic Registration Mark Sensor) which is driven by vectored lines in a drawing program like Adobe Illustrator.
Common Errors With Art Files
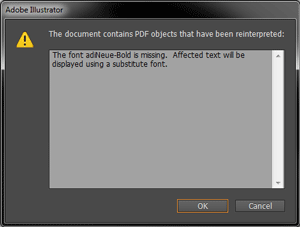
Common errors include incorrect color space, missing fonts, using low resolution artwork, missing images, incorrect size of art, and saving files in a non-compatible format.
Print Prepress Basics for the Digital Printed Workflow
Create a clean print file in 8 steps:
Step 1
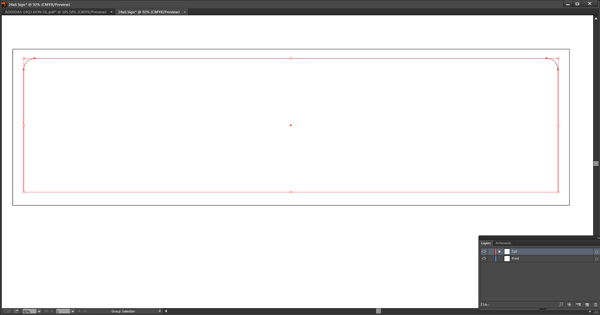
In Illustrator create a CMYK art board 1/2″ larger on all sides than the final trim size of your sign.
I will be creating a 24″ x 6″ sign with 1/2″ radius on the top two corners.

Step 2
Go to your layers palette and name the existing layer “Print.” Create a new layer above the Print layer and name it “Cut”.

Step 3
Create your dieline with the pen/rectangle/ellipse tools in Illustrator or import a CAD file compatible with Illustrator. If you are creating your own dieline move on to step 5.
Step 4
If the dieline is brought in from CAD software there is a chance that the lines are not contiguous (continually connected). If the nodes are not connected there are a couple options. The nodes can be connected manually or you can download a plug-in by Graffix called Concatenate that will do it for you. The goal is to use the least amount of nodes to create the shape. NOTE: There should not be a node on top of another node.

Step 5
Design your artwork on the Print layer. Images should be high resolution ranging from 225PPI to 300PPI. Make sure your rasterized images are copied into the artwork and not placed. If the image is placed then make sure to embed it. See here if you need help.

Step 6
Bleed your artwork 1/8″ past your dieline.

Step 7
Create outlines of all your fonts. Select all of your text and go to the main tool bar up top and click “Type” > “Create Outlines.”

Step 8
Save As > PDF. When the PDF menu pops up go to the options tree on the left and select “Compression?. Under “Color Bitmap Images” change the “Do Not Down sample” to “Average Down sampling To” 225 for images above 300 PPI. Under “Greyscale Bitmap Images” change the “Do Not Down sample” to “Average Down sampling To” 225 for images above 300 PPI.
Under “Monochrome Bitmap Images” change the “Do Not Down sample” to “Average Down sampling To” 300 for images above 450 PPI. Click SAVE PDF. Note: The file can also be saved in the native illustrator file format of “.ai”.

Now you’re done.
The resulting finished product.

Jim Hollen is the owner and President of RICH LTD. (www.richltd.com), a 35+ year-old California-based point-of-purchase display, retail store fixture, and merchandising solutions firm which has been named among the Top 50 U.S. POP display companies for 9 consecutive years. A former management consultant with McKinsey & Co. and graduate of Stanford Business School, Jim Hollen has served more than 3000 brands and retailers over more than 20 years and has authored nearly 500 blogs and e-Books on a wide range of topics related to POP displays, store fixtures, and retail merchandising.
Jim has been to China more than 50 times and has worked directly with more than 30 factories in Asia across a broad range of material categories, including metal, wood, acrylic, injection molded and vacuum formed plastic, corrugated, glass, LED lighting, digital media player, and more. Jim Hollen also oversees RICH LTD.’s domestic manufacturing operation and has experience manufacturing, sourcing, and importing from numerous Asian countries as well as Vietnam and Mexico.
His experience working with brands and retailers spans more than 25 industries such as food and beverage, apparel, consumer electronics, cosmetics/beauty, sporting goods, automotive, pet, gifts and souvenirs, toys, wine and spirits, home improvement, jewelry, eyewear, footwear, consumer products, mass market retail, specialty retail, convenience stores, and numerous other product/retailer categories.